
Cracking open a new score is such a satisfying feeling, as long as you’re not doing that on the first day of rehearsals! Assuming you’ve purchased your score well before your rehearsal period, I’m going to share with you my technique for preparing music to learn a new role in an efficient and organized way.
Nothing will replace the quality time you spend practicing, but by doing this preparation work, you can focus more on the singing and less on googling when you do finally reach the practice room. These are the beginning steps when learning a new role besides the research, character development, and private musical rehearsals you must do before starting staging.
Getting acquainted with the new, clean pages of an opera feel so inviting to me, as if they’re waiting to be marked and highlighted. But before we get into the ‘How to’, I have to preface that this is my method. It’s one that has evolved and will continue to evolve.
By sharing my method, I hope it will inspire and guide you to create your very own process. If something works for you already, keep it! There is no one-size-fits-all method, so please take what works for you from my method and leave whatever doesn’t serve you.
Why mark up a score?
Fair question. Scores are already filled with details and markings which the composer has written to express exactly what they want, with the exception of early baroque repertoire—these dynamic markings there are usually done by the editors and don’t come from the composers. Notating further can complicate an already busy page and make the music harder to read. The more detailed and organized you are in your own preparations, the more efficiently you learn and retain the material in a way that is geared to your learning style. For me, having a personal color system is what works.
When I’m glancing at a score in a coaching or practice session, I want to focus on style, refining technique, or leaning into the options of my character’s emotional expression. When learning new music especially, I rely on a color system to conduct myself and maintain rhythmic accuracy when navigating difficult melodic lines. By using a variety of colors for markings, I can search less through the plain black and white score for the meters, dynamics, and tempo changes and let the colors tell me what I need to know to focus on my notes.
How I annotate on my music is by drawing attention to what is most important for me to read, and it allows me to memorize the score fast. By using highlighters, I can emphasize what I need to read on a page and search the page for information less. The basis of highlighting, tabbing, and translating is only to organize the score in a way to visually serve me.
How to think about marking your music
Look at your score as a kind of map. The more personalized the shortcuts and directions are, the better you can focus on what’s important on any page—or the value of not being on stage and getting some vocal rest.
Sometimes I need to mark when to prepare my breath for a long passage on the following page, and at other times I write ideas, thoughts, or subtext the characters might experience. This is all to make the journey easier.
Through markings and using tabs/paperclips, I can map out a unique journey for my interpretation of the character.
A benefit of this process is that when I open up a score, even if I haven’t looked at it in years, my markings tell me everything I need to know specific to my impulses and technical tendencies.
Preparing a Digital vs Physical Musical Score
For environmental sustainability and lightening my bag, I love working with my iPad Pro. Digital backups can also be a total lifesaver when traveling and needing to look at a score on the go, or having a last-minute music need. Keeping a copy of my scores also allows me to mark up a score, erase everything, and mark up the music again! I’ve been using the forScore app for years now. The app allows you to highlight, add text, and even have helpful practice tools like a built-in piano keyboard and metronome function.
But nothing beats working with a physical score when you’re learning a role for the first time. For me, the sensation of paper is too unique to the memorization process—I guess I’m old-fashioned! I’ve learned plenty of music from an iPad, and it takes longer for me to memorize the music. With a tablet, I don’t have the sensory connection to what point I am within a piece of music. I like to see and feel how many pages remain. When using my iPad, I tap the screen endlessly, whereas in a score I can go straight to the next tab. Another advantage to a printed score is collecting and stuffing the pages full of sticky notes, photos, programs, and memos from the directors and music staff—something that makes a score more loved and special.
Now, Let’s Organize Your Score.
Mezzo Adventures is a participant in the Amazon Services LLC Associates Program, an affiliate advertising program designed to provide a means for sites to earn advertising fees by advertising and linking to Amazon.com.
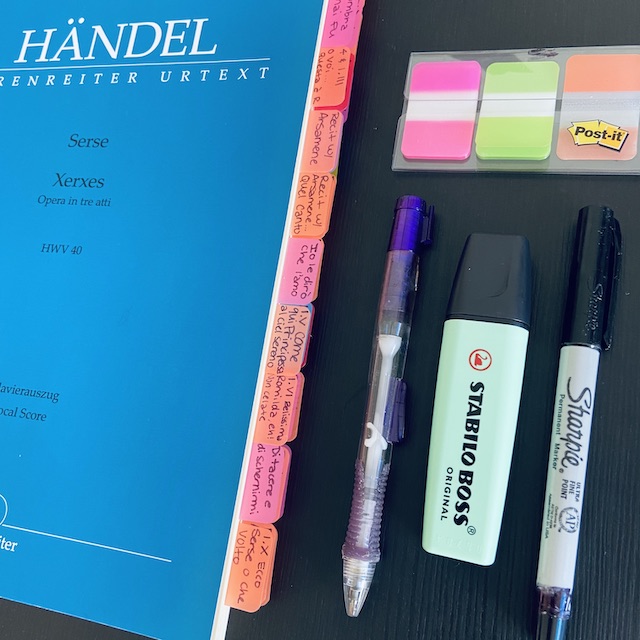
Organizational Supplies for your Music
Using supplies that you enjoy will make a difference because you’ll want to use them! Here are some of my favorites:
Chisel Tip Highlighters
Have a variety of colors to choose from to mark up your score! You’ll see why in steps 1 and 4.

Post-it Tabs
These are how you will label your score to easily flip to each of your vocal entrances. I love these tabs because they are really sturdy.


Extra Fine Tip Black Sharpie
These are the best markers I’ve found for writing on the Post-it tabs I recommend for organizing all the musical numbers in a score. The fine tip point is small enough that you can get plenty of text on the tab and the marker won’t wipe off or transfer.

Post-it Notes
Using Post-it notes for cuts and staging saves your score from becoming too busy and then having to erase pencil markings later on. Ideally, you will use the same score over multiple productions—you probably don’t want to prepare a new score every time. Post-it notes are a convenient way to add and remove staging directions and cuts during each production while maintaining the organization of your beautifully prepared score.

Pencil and Eraser
I’m certain you already have some of these, but I wanted to list my favorite mechanical pencils which have lasted me for many years. They’re the most comfortable for long score prep sessions when writing in translations.

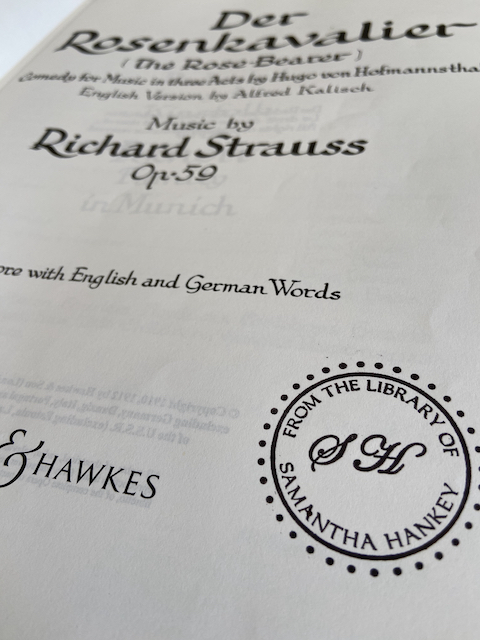
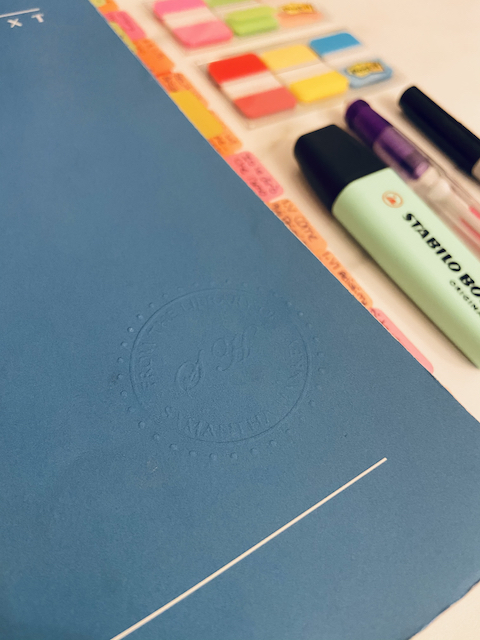
Something unnecessary, but I think adds a beautiful and personal touch to a score, is embossing and stamping your personal music library. This provides me a bit of security if I were to leave a score behind in a practice or rehearsal room knowing it has my details to be (hopefully) returned. I ordered my matching stamp and embossing set from Wilshire Graphic Press Inc. over ten years ago! WG Press has generously extended a 10% discount to my readers for the month of February on orders over $30 with the code SAMANTHA10 (I don’t receive any commission from this, it’s just a coupon for my readers). Their Etsy shop is: https://www.etsy.com/shop/wgpress/
STEP 1: Highlight Your Role
Highlight your character’s name and the clef whenever they appear to sing.
Some people like to highlight the entire system or their lines of text, but this can make the page too busy combined with the rest of my system. I would only recommend highlighting the staff or text with a yellow highlighter when performing unmemorized music offstage, as the black lights in the wings will illuminate the highlighter and make everything easier to read. Apparently yellow highlighter doesn’t work well in some concert venues like churches because of the ambient lighting, but pink or green highlighter should do the trick.
STEP 2: Tab the Opera Score
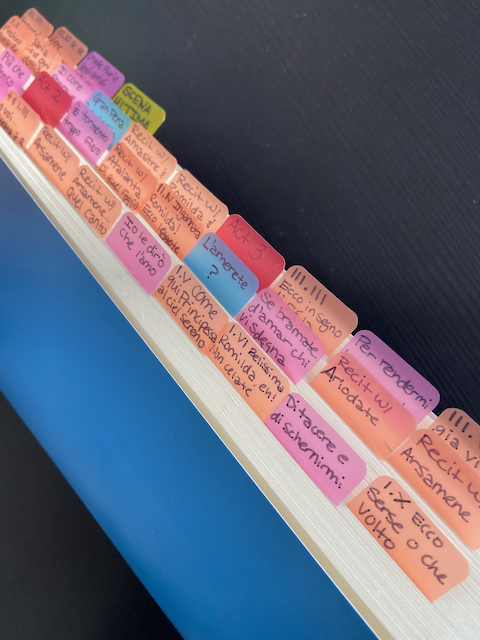
Tab the score so you can see your arias, duets, and quickly flip through to specific sections. Maintain a consistent color to stay organized too. This way it’s easier to identify, for example, an aria in act 1 and not flip to a random recitative. This helps you visualize your character’s appearances and at which part of the score you are.
In my music, I always have the start of a new act in red, any recitative my character sings with an orange tab, and arias in pink (yes, even when singing a pants role). I save green for duets and blue for ensembles when applicable.
STEP 3: Translate
If you’re not fluent in the language of the piece, you must translate it! I recommend first reading the entire libretto. You must know what your character and others are singing about. Make sure you translate any tempo, musical, and stage directions as well.
Translating is the most time-consuming step of my score preparation. While I do this step, I like to listen to a recording or watch a performance of the piece I’m working on. Efficiency is important to me, so getting music into my ear subconsciously while doing other things is essential to my process.
As you get further into your score preparations, create a Spotify or YouTube playlist to listen to a wider variety of recordings. This will help you to not imitate one specific artist. It can be so interesting and fun to hear different stylistic changes in interpretation through recordings, especially when stylistic ideas have changed over the years.
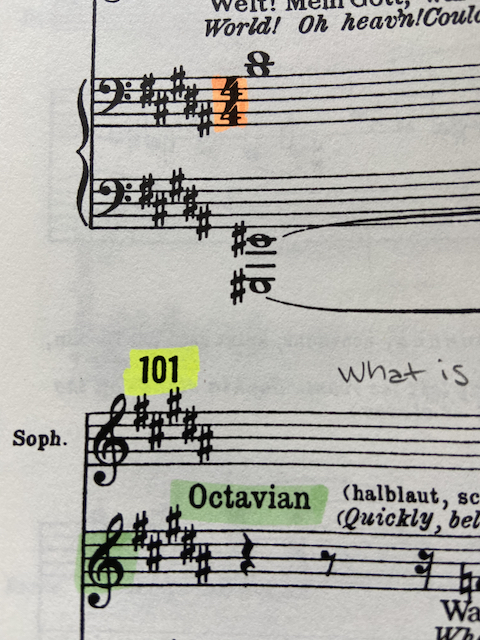
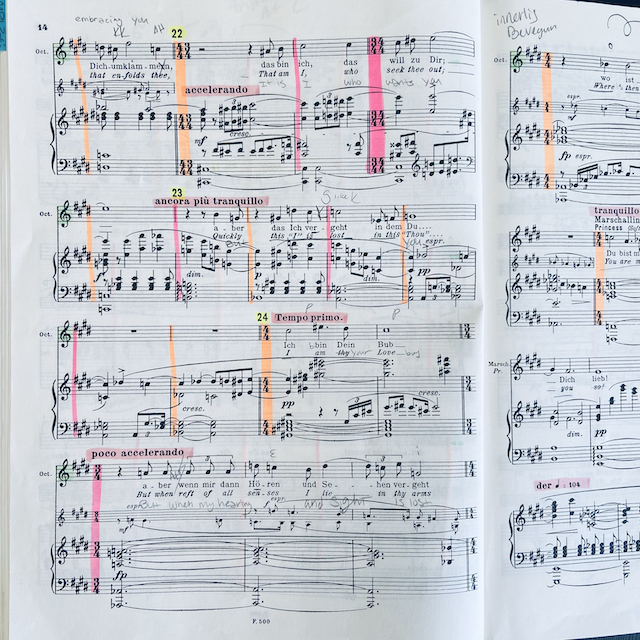
STEP 4: Highlight Time Signatures and Tempo Markings
Depending on the work, I may go through the score again and highlight tempo markings and any alternating meters. This is less important for standard baroque, classical, and bel canto repertoire, but useful for modern music and early baroque, where recitativo secco and cantando alternate, and arioso bits are often in ¾.
When conducting myself during practice sessions, it’s easier for me to see the color orange and know to follow a 4 pattern, instead of looking closely to read the meter in black and white. The physical action of conducting helps me internalize the phrase as well.
I highlight meters conducted in variations of 2 in green, 3 in pink, 4 in orange, and 5 in blue. For operas by Strauss and many modern composers, this is what my score might look like:
STEP 5: Add in Cuts and Next Vocal Entrances
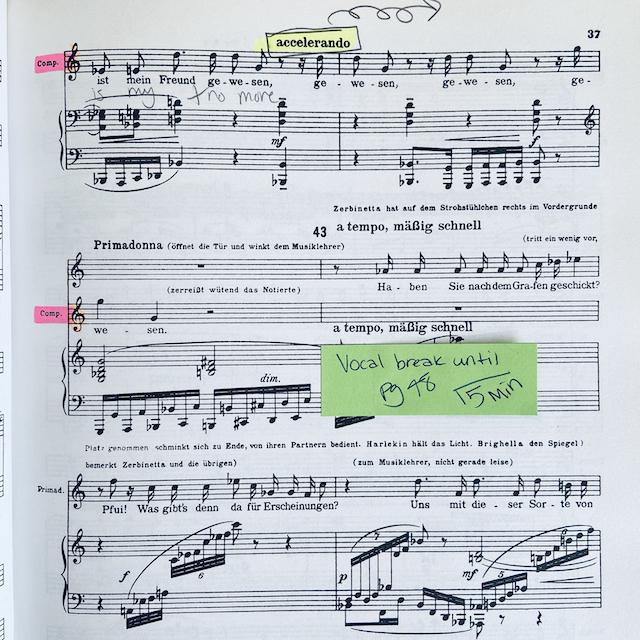
Prepare any cuts by using Post-it notes. On the Post-it note, explain the specific details of where the cut begins and ends (within the measure, beat, and/or word). Cuts can and often do change; instead of drawing a big line across the entire page, using sticky notes allows you to open, re-open, or change a cut with little erasing. When large sections of music are cut, only use a Post-it note at the beginning and end of the cut, then group the pages in between with a paper clip. Even when music is cut, don’t forget to know what happens in these parts!
I find it useful to write out when a character’s next entrance is. Tabs will help you get to the start of a section, but within that section you might have many pages without an appearance. At each exit of the character, write down the page number of the next entrance; it’s so convenient.
For more demanding roles, it’s useful to also write out the approximate time duration of vocal break your character has. You can figure out how much time there will be by comparing a few recordings and estimating how many minutes there are. Then, when you reach this section of vocal rest in your practice, set a timer for the vocal breaks you will get on stage (or in the wings) to help plan out the demands of the part.
For example, in Strauss’ Ariadne auf Naxos, the Komponist only appears in the prologue, but it is 45 minutes of demanding singing. In my practice sessions, I would include and time out a short vocal break for the 5 minutes I would have on stage to anticipate and become familiar with that short period of vocal rest and recovery. These brief periods give me time to reground my body, calm my breath, and refocus technique as needed. The break might not be enough time to run back to a dressing room, but it is a valuable time and is part of planning out the stamina needed for performances.
Finally, after completing these 5 steps to preparing a score, it is time to sing!
It feels great to do this organizational work knowing that everything has been clearly organized and marked. And when I crack open this score again after a few years, I’ll know exactly what to do, even if I forget how the music sounds in my head.
Please let me know in the comments what you might use from my method and how you prepare a score that is different. I’d love to get some ideas of what works for you to test out in my next score.
To help you prepare your next score, I’ve created a printable checklist to follow the steps mentioned in this blog post and a role study progress checklist as well!

4 Comments
S
February 4, 2021 at 10:32 pmI am so impressed by your level of organisation! It’s fun to read about your process, thanks.
mezzoadventures
February 7, 2021 at 8:14 amThanks! 🙂
Greg
April 5, 2021 at 9:37 pmIs there any way to download the workbook? I am having difficulty seeing it when I click the link.
mezzoadventures
April 12, 2021 at 2:42 pmHey there, Greg! Try using this link and after entering your name and email you should receive the workbook to your inbox! 🙂 https://expert-architect-7213.ck.page/f2a235b35d